참고 : https://www.tuwlab.com/ece/28638
Mozila 재단에서 진행하는 무료SSL 인증서 발급 프로젝트 이다. ( https://letsencrypt.org )
90일 단위로 갱신을 해야 하는 단점이 있지만 이부분은 cron 등록으로 극복이 가능 하다.
무엇보다 무료라는 강점이 있기 때문에 많이 사용될 가능성이 크다.
SSL을 도입할경우 스니핑등을 예방할수 있으며 국내법적으로는 회원의 개인정보를 수집하는 사이트의 경우SSL을 도입해야 한다.
여기서 설명하는 내용은 CentOS 6.x 와 이미 APM이 구축된 서버에서 진행 하였습니다.
1. 설치 ( ISU 레포지트리 배포처 https://ius.io/GettingStarted )
yum install epel-release
rpm -ivh https://rhel6.iuscommunity.org/ius-release.rpm
yum install git python27 python27-devel python27-pip python27-setuptools python27-virtualenv python27-libs
설치는 그냥 필수 라이브러리를 설치하고 git을 통해 실행 스크립트를 가져오는 수준이다.
2. 실행(일반 사용법)
chmod 700 /usr/bin/gcc /usr/bin/g++
chattr +i /usr/bin/gcc /usr/bin/g++
mkdir /usr/local/certbot
cd /usr/local/certbot
wget https://dl.eff.org/certbot-auto
chmod a+x ./certbot-auto
// 필요한 패키지를 설치하기 위해 실행한다.
./certbot-auto certonly
*** 패키지가67개 정도 설치가 되었다.
** 패키지 설치후 E-mail 을 입력하라는 곳에서 C 를 입력하여 종료한다. ** 한번더 실행하여 인증서를 받도록 하기 위함..
웹서버 운용시 일반적으로 gcc 에 보안설정을 해서 제공을 하게 되는데 일반적으로 퍼미션 700 과
chattr +i 를 해놓는다.
Saving debug log to /var/log/letsencrypt/letsencrypt.log
How would you like to authenticate with the ACME CA?
- - - - - - - - - - - - - - - - - - - - - - - - - - - - - - - - - - - - - - - -
1: Apache Web Server plugin (apache)
2: Spin up a temporary webserver (standalone)
3: Place files in webroot directory (webroot)
- - - - - - - - - - - - - - - - - - - - - - - - - - - - - - - - - - - - - - - -
Select the appropriate number [1-3] then [enter] (press 'c' to cancel): 1
Enter email address (used for urgent renewal and security notices) (Enter 'c' to
cancel): admin@yourdomain.com
- - - - - - - - - - - - - - - - - - - - - - - - - - - - - - - - - - - - - - - -
- - - - - - - - - - - - - - - - - - - - - - - - - - - - - - - - - - - - - - - -
Please read the Terms of Service at
https://letsencrypt.org/documents/LE-SA-v1.2-November-15-2017.pdf. You must
agree in order to register with the ACME server at
https://acme-v02.api.letsencrypt.org/directory
- - - - - - - - - - - - - - - - - - - - - - - - - - - - - - - - - - - - - - - -
(A)gree/(C)ancel: A
- - - - - - - - - - - - - - - - - - - - - - - - - - - - - - - - - - - - - - - -
Would you be willing to share your email address with the Electronic Frontier
Foundation, a founding partner of the Let's Encrypt project and the non-profit
organization that develops Certbot? We'd like to send you email about our work
encrypting the web, EFF news, campaigns, and ways to support digital freedom.
- - - - - - - - - - - - - - - - - - - - - - - - - - - - - - - - - - - - - - - -
(Y)es/(N)o: N
Please enter in your domain name(s) (comma and/or space separated) (Enter 'c'
to cancel): server.yourdomain.com
Obtaining a new certificate
Performing the following challenges:
http-01 challenge for ubuntu.vitamineshop.co.kr
Waiting for verification...
Cleaning up challenges
3. 단축 명령어(인증서 발급)
./certbot-auto certonly --server https://acme-v02.api.letsencrypt.org/directory \
--rsa-key-size 4096 --agree-tos --email youremail@yourdomain.com \
--webroot -w /home/유저디렉토리/html/ \
-d www.yourdomain.com -d yourdomain.com
-d 도메인
–-email 이메일주소
–-webroot w /경로/
자신의 서버에 맞게 수정하여 실행한다.
일반적으로 -d yourdomain.kr -d www.yourdomain.kr 과 같이 명령해야 한다.
* 추가적으로 여러개의 서브도메인도 한번에 할수 있다
-d www.yourddomain.kr -d yourdomain.kr -d sub.yourdomain.kr
4. 아파치 설정.
1 2 3 4 5 6 7 8 9 10 11 12 13 14 15 | SSLProtocol ALL -SSLv2 -SSLv3 SSLCipherSuite ECDHE-RSA-AES128-GCM-SHA256:ECDHE-ECDSA-AES128-GCM-SHA256:ECDHE-RSA-AES256-GCM-SHA384:ECDHE-ECDSA-AES256-GCM-SHA384:DHE-RSA-AES128-GCM-SHA256:DHE-DSS-AES128-GCM-SHA256:kEDH+AESGCM:ECDHE-RSA-AES128-SHA256:ECDHE-ECDSA-AES128-SHA256:ECDHE-RSA-AES128-SHA:ECDHE-ECDSA-AES128-SHA:ECDHE-RSA-AES256-SHA384:ECDHE-ECDSA-AES256-SHA384:ECDHE-RSA-AES256-SHA:ECDHE-ECDSA-AES256-SHA:DHE-RSA-AES128-SHA256:DHE-RSA-AES128-SHA:DHE-DSS-AES128-SHA256:DHE-RSA-AES256-SHA256:DHE-DSS-AES256-SHA:DHE-RSA-AES256-SHA:!aNULL:!eNULL:!EXPORT:!DES:!RC4:!3DES:!MD5:!PSK SSLHonorCipherOrder on Listen 443 <VirtualHost *:443> DocumentRoot /free/home/enteroa/html ServerName wp.enteroa.kr SSLEngine on SSLCertificateFile /etc/letsencrypt/live/wp.enteroa.kr/cert.pem SSLCertificateKeyFile /etc/letsencrypt/live/wp.enteroa.kr/privkey.pem SSLCertificateChainFile /etc/letsencrypt/live/wp.enteroa.kr/chain.pem SSLCACertificateFile /etc/letsencrypt/live/wp.enteroa.kr/fullchain.pem Header always set Strict-Transport-Security "max-age=15552000" </VirtualHost> |
SSLProtocol, SSLCipherSuite, SSLHonorCipherOrder 설정은 그냥 같이 올렸다.
https://www.ssllabs.com/ssltest 에서 테스트를 할경우 A+를 받을 수 있는 설정임.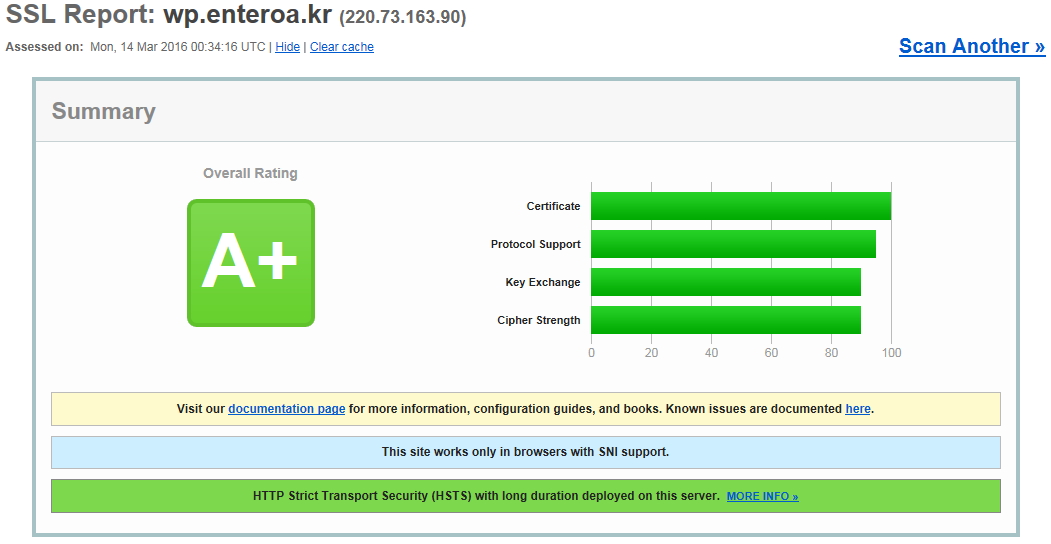
설정 완료 후 브라우져를 통한 사이트 접속을 해서 https 가 적용되었는지 확인한다.
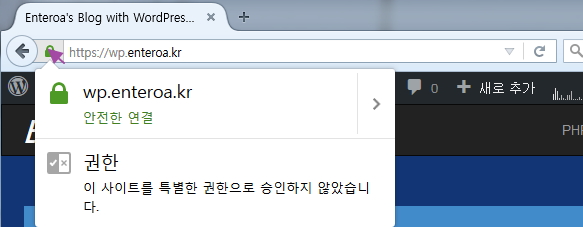 녹색 열쇠가 뜨지 않고 아래와 같이 일부가 안전하지 않다고 뜬다면.
기존에 구성된 홈페이지의 소스상 https 가 아닌 http 선언이 있기 때문이다.(대부분 이미지 혹은 외부링크)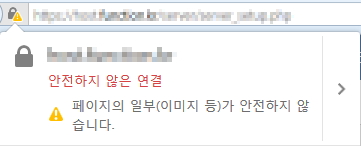
아래처럼 이걸 소스에서 찾아서 일일이 수정해주는 방법이 있겠다 =3=a
1 2 3 | <script type="text/javascript" src="http://wcs.naver.net/wcslog.js"></script> <script type="text/javascript" src="//wcs.naver.net/wcslog.js"></script> |
5. 갱신
1 2 3 4 5 6 7 8 9 10 11 12 13 14 15 16 17 18 19 | #!/bin/bash # 실행 조건 1일 1회 작동 ## pid 생성 중복실행을 방지 ####################################################### if [[ -s $0.pid ]];then exist_pid=$(cat $0.pid) if [[ -z $(ps -e|grep "^$exist_pid ") ]];then rm -f $0.pid;exec_confirm="Y" else exec_confirm="N";echo -e "\e[1;32mShell has already running...\e[0m";fi else exec_confirm="Y";fi if [[ $exec_confirm == "Y" ]];then echo $$ > $0.pid ################################################################################### cd /usr/local/certbot chattr -i /usr/bin/gcc /usr/bin/g++ /usr/local/certbot/certbot-auto renew --quiet chmod 700 /usr/bin/gcc /usr/bin/g++;chattr +i /usr/bin/gcc /usr/bin/g++ find /tmp -maxdepth 1 -type d -perm 700 -user root -name 'tmp.*' -exec rm -rf {} \; ################################################################################### rm -f $0.pid fi ################################################################################### |
gcc 와 c++ 명령어 보안설정 때문에 스크립트를 운용한다.
일반적으로는 /usr/local/letsencrypt/letsencrypt-auto renew –quite 으로도 충분.
자체적으로 만료일이 도래하지 않은 도메인은 갱신을 건너뛰기 때문에 매일 돌리면 된다.
6. 이용 제한( rate limit )
아무래도 무료SSL의 무분별한 사용을 막기 위한 설정이라고 보면 되겠다.
- 1개의 IP 에서 3시간동안 10개의 도메인을 허용한다.
- 7일 동안 1개의 도메인에서 5개의 도메인레코드 선언을 허용합니다.
(enteroa.kr / www.enteroa.kr / mail.enteroa.kr / blog.enteroa.kr / etc… )
이 rate limit 는 발급받은 SSL 을 revoke(취소) 하거나 /etc/letsencrypt/ 에 생성된 항목을 삭제하더라도 반환되지 않습니다.
7. 인증서에 도메인 추가.
예를 들어 wp.enteroa.kr 만 등록한 도메인이 있을경우
인증서등록을 기존 도메인명을 처음부분에 선언하여 레코드(DNS)를 추가할 수 있다.
1 2 3 4 5 | ~]# cd /usr/local/certbot ~]# ./certbot-auto certonly --server https://acme-v01.api.letsencrypt.org/directory \ --rsa-key-size 4096 -agree-dev-preview --agree-tos \ --webroot -w /free/home/enteroa/html/ --email enteroa.j@gmail.com \ -d wp.enteroa.kr -d enteroa.kr -d www.enteroa.kr |
위 명령어로 진행시 기존 인증서에 도메인을 추가(EXPAND)할껀지 물어보는데 enter를 눌러서 진행하면 된다.
자세한 사용법(물론영어)은 http://letsencrypt.readthedocs.org/en/latest/using.html
'보안이슈' 카테고리의 다른 글
| letsencrypt ssl 발급, 추가, 삭제 (0) | 2019.07.24 |
|---|---|
| LINUX MALWARE DETECT (0) | 2019.01.22 |
| let’s Encrypt SSL 무료 인증서 certbot을 통해 설치 및 설정하는 방법 (0) | 2018.08.24 |
| mod_security 로 아파치 웹서버 보안 강화하기 (0) | 2018.07.10 |
| php 해킹파일 검색 (0) | 2018.05.23 |
댓글